

How Nashville Cowboy Boots Are Made
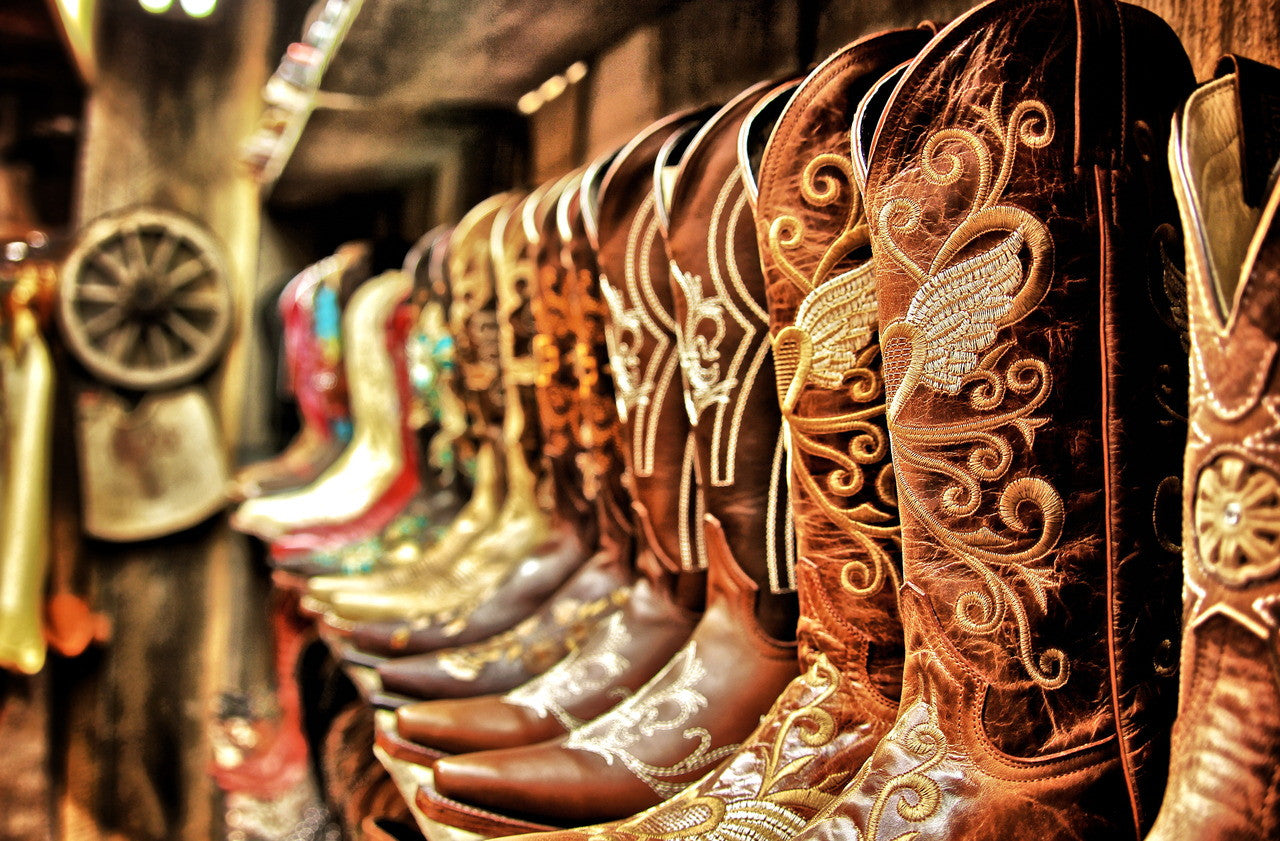
Cowboy boots are considered high fashion leather. And they are undoubtedly a Nashville staple for men and women alike looking to show off their sense of style.
Even the most sartorially savvy consumers, however, don’t necessarily appreciate what goes into creating cowboy boots. It’s a process that can range from basic to extremely complicated, although true Nashville-style cowboy boots are typically only of the highest grade.
We’d like to walk you through the process for making cowboy boots worthy of Music City. Enjoy! :)
As a start, you’ll need to make sure you have the following basic materials on hand:
- Cutters
- Tacks
- Leather
- Metal shanks
- Nails
- Glue
- A last
1. Cutting. This is the first step in the boot making process and entails dividing the leather into its three main parts: the counter, uppers, and vamp. The vamp represents the top of the cowboy boot. The counter goes over the heel area, and the uppers cover the shin and calf muscle. Boot makers in Nashville manually cut the leather by hand, while large, national manufacturers have machines to perform this work. Often, however, cutting by machine takes away from the authentic feel a great deal. After the cutting is completed, you’ll glue the materials together and reinforce them with some type of lining.

2. Decoration. Planning and execution of the decoration should occur before any of the other boot parts are put together. Local boot makers who craft their footwear by hand often use stencils to create the design. Large manufacturers tend to use heavy-duty sewing machines to stitch their designs into the material.

3. Splitting the Leather. Divide the leather into front and back sections. This will make it much easier to sew the pieces together and mold them into your shape of choice. Once you’ve attached the vamp to the front part of the upper, the welt should be left free for use in the last stages of the boot making process. Sew together the leather pieces that comprise the front and back portions of the boot.
4. Using the Last. Usually, the foot model, or last, employed will be made of wood. Tack the insoles onto the last, then the sewn vamp and counter. After you’ve stitched the welt into the remainder of the vamp and insole, you’re finished with the leather part of the boots!

5. Finish off the Boot. Since you already have the welt holding your leather in its shape, it’s time to take out the tacks attaching the material to the last. Hang your shoe against a metal shank for shaping and fitting of the soles. Boot makers typically glue the soles in place, stitch them to reinforce their strength, then nail in the heels. Snip off any loose seams and sand the heels into your desired shape before dying the boots to your desired color and polishing them to perfection!
Leave a comment